 Cue
Cue 
Killian walks you through it
Hi. I'm Killian.
Your backstage reaper. I used to work in AV. I coiled the cables, I chased the laptop op, I watched good shows die on one late cue. So I picked up a scythe. Now I run the lights, sound, screens and camera, and you go be the talent.
One app, two sizes.
I live on iPad and iPhone. Same buttons, same show, same reaper. The iPad shows more at once; the iPhone stacks it.
Which one am I on? Tap it.
Everything in this walkthrough works on both. I'll show you the screens for yours.
Your whole show is one list.
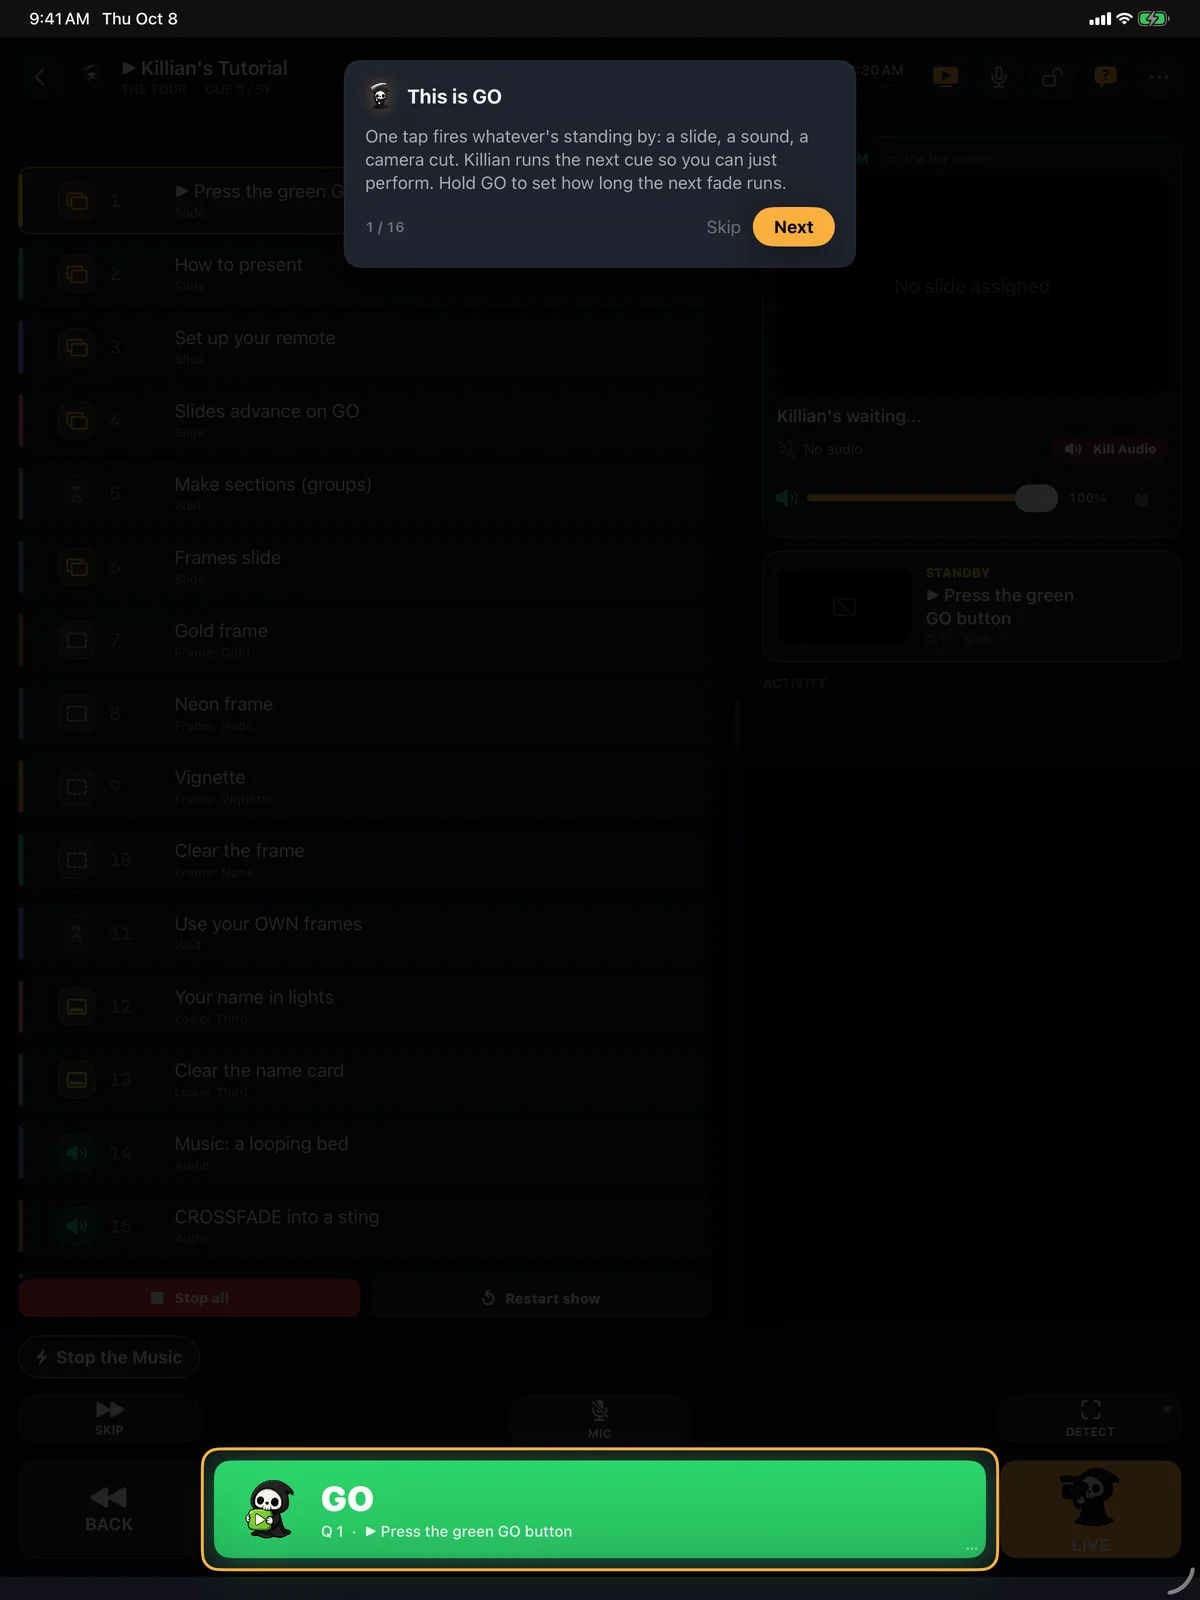
One green button runs it.
That is the entire idea. One GO. Everything after that is my problem.
You are the performer and the whole booth
I've stood at the back of enough rooms to know what a solo show takes. Here is what I came to kill.
So you juggle. You look down. The reveal lands after the laugh. Two seconds of dead air, and the audience sees the seams. Unforgivable.
And where I don't.
A cue app that only plays sounds is a jukebox with a nicer button. I'm the whole booth. Seven places the others stop and I keep going.
Every one of those gets its own step in this walkthrough. Hand me the show. Go be the talent.
Every moment is a cue.
A cue is one thing that happens on stage: a slide appears, a song starts, the camera cuts in, the lights go black. Your show is those cues in one list, in the order they happen. Three apps walked in. One button walked out.
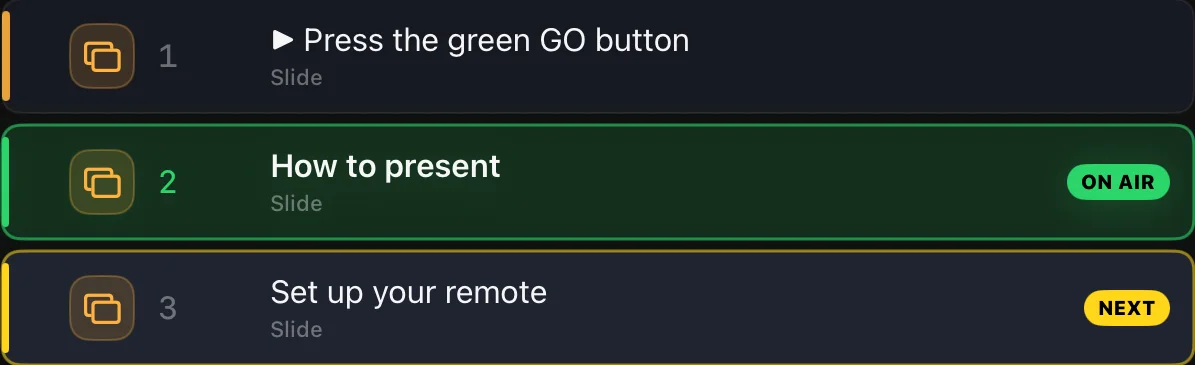
You press one button. I fire the next cue. Then the next. Your timing, my blade. That is your whole job on stage.

A clicker, a foot pedal, a Flic, your voice, even a prop held up to the camera can press GO for me. We get to all of that. First, the basics.
Works with the gear you already own.
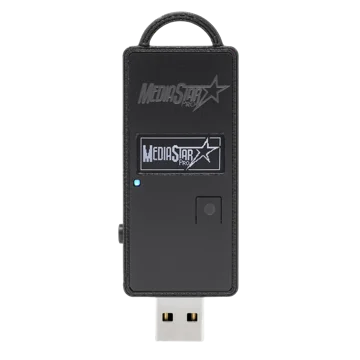
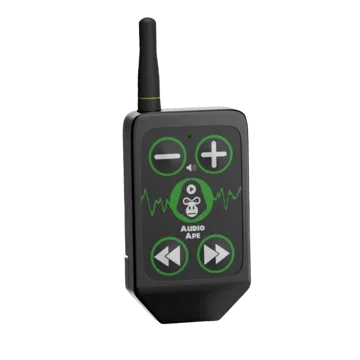
Whatever is in your bag right now can be my GO button. A MediaStar Pro, an Audio Ape, a foot pedal, a Flic, a presentation clicker, a game controller, a MIDI pad, a Bluetooth keyboard. I'm not picky. I'm hungry.
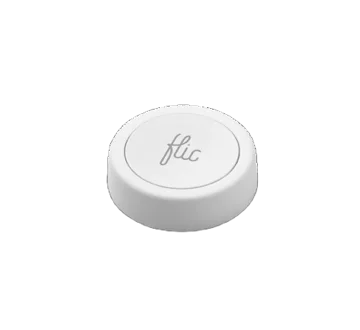
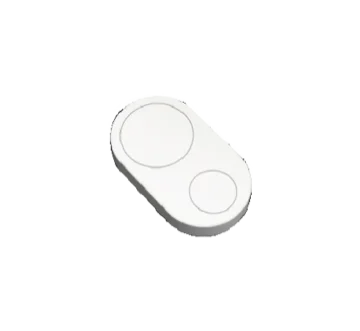
Even remotes that were never meant for media. You do not need a "cue app" remote. Press any button on any remote and I tell you what I heard: a keyboard key, a media key, a volume key, a game-controller button. Then tap Learn and that button is yours. Mine, technically. Ours.
More out of every button
One button can do up to five things: a tap, a double tap, a triple tap, a quadruple tap, and a hold. So a one-button clicker runs GO, BACK, blackout, kill audio and camera, without changing anything about the clicker.
No remote at all? Any phone on the same Wi-Fi opens a web remote in its browser: GO, BACK, camera, panic, behind a pairing code. A friend at the back of the room can drive. Greg, even. Supervised.
Most remotes pair with the iPad itself first, in iOS Settings under Bluetooth, and then just work. Flic buttons pair inside me. Audio Ape and MediaStar remotes work in their media mode, and if yours has a keyboard mode, that is the most reliable way to connect.
A lighting desk, QLab or a TouchOSC layout can drive me over OSC. MIDI pads and keys map by note. You will set all of this up in the remotes step later in this walkthrough.
Bring your show with you.
Running on Go Button today? Export the show from there and open the file on me. It comes in as a Cue Killer show with every track already linked. Nothing to rebuild. I don't make you start over; that's Greg's move.
- In Go Button, export the show as a Show Bundle. That is the file with all the audio packed inside.
- Get the file to your iPad: AirDrop, iCloud Drive, Dropbox, anything Files can see.
- On my home screen, tap New, then Import show, and pick the file.
Your cue order, volumes, fades, crossfades, pre-waits and auto-follows all carry over. Pick up on cue 1 and keep going.
A plain Go Button file without the audio inside also imports. The cue list comes in and links to any tracks already in my library by name.
I also open Cue Killer show files from another iPad or iPhone, and CSV cue lists. A show with several cue lists comes in as one running order.
Get me on your device.
Grab your iPad or iPhone. We do this part together. It's the only part where I need you to type.
- Open the App Store and search for Cue Killer, or tap this: Get Cue Killer on the App Store
- Install me, then open me. You land on my sign-in screen.
- Sign in with Apple (one tap, no password to remember) or with your email.
- Pick a plan. Your first month is free. A card is needed to start it, and each account gets one trial.
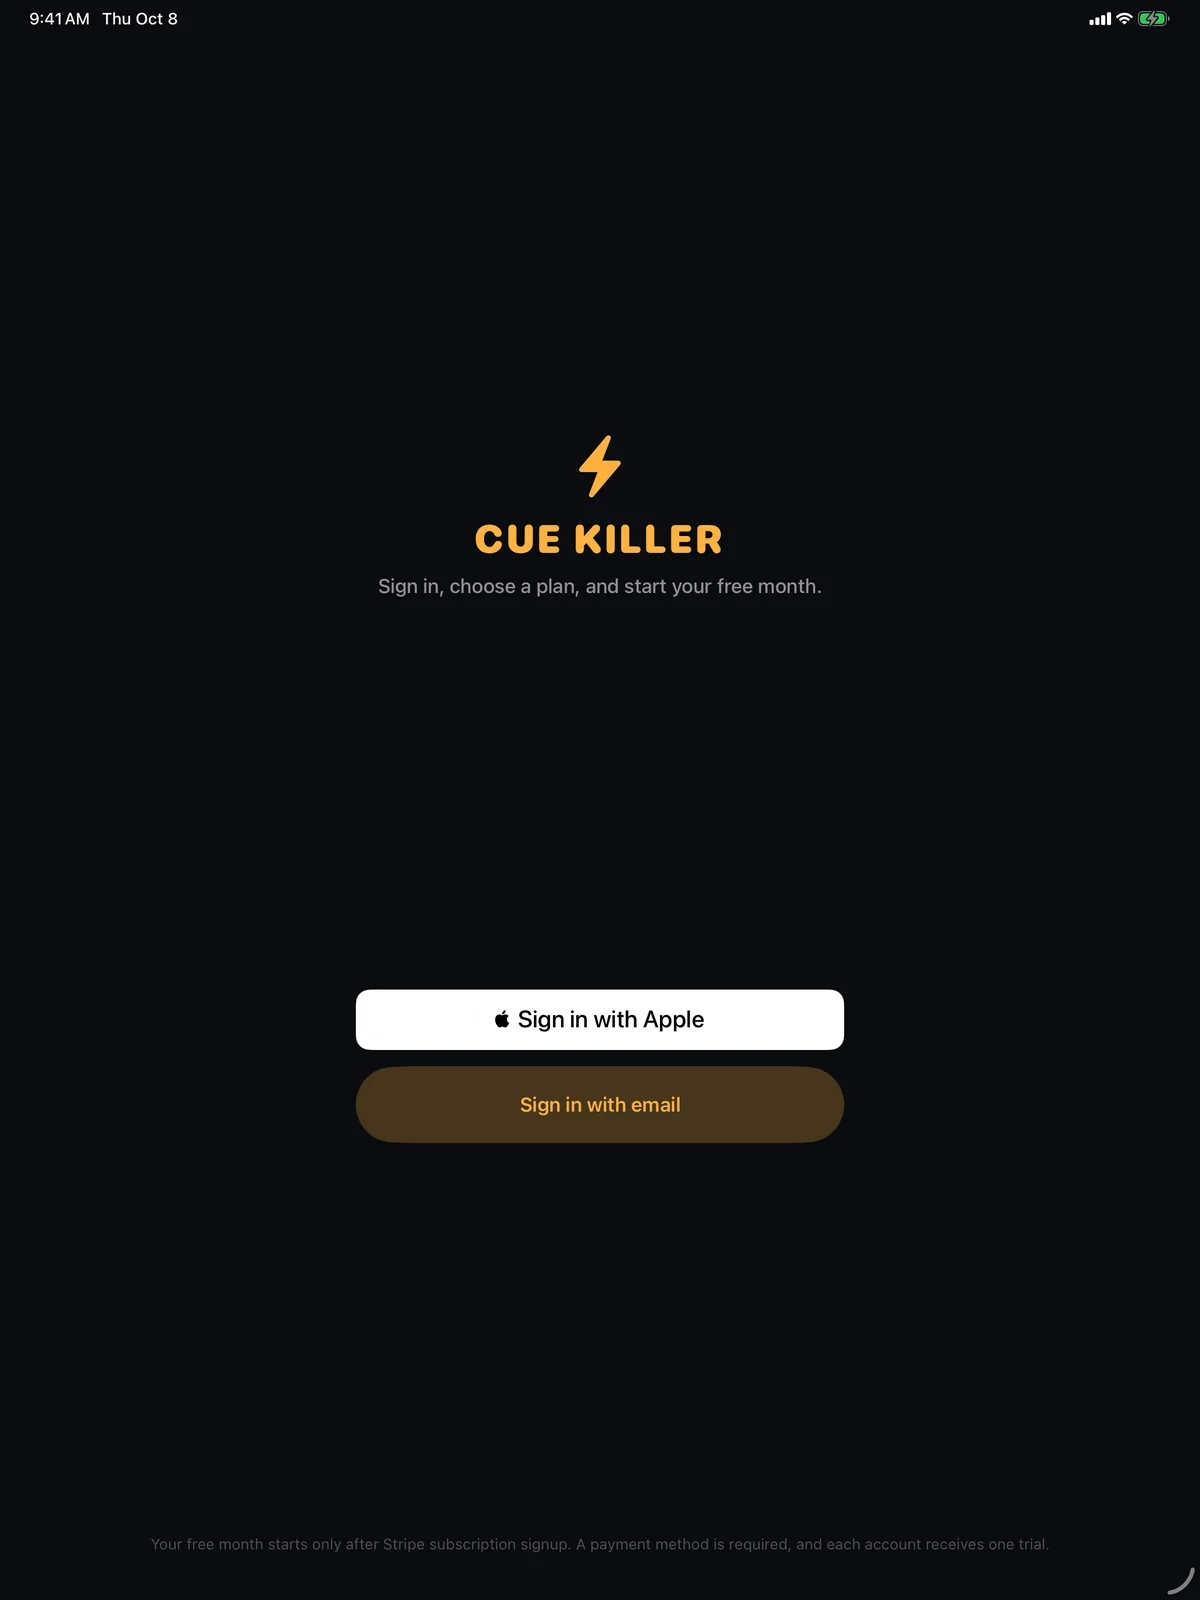
Your first sign-in needs an internet connection so I can confirm your trial or subscription. If you are offline, connect once, sign in, and you are set.
Plans, promo codes and billing all live on the website, under My Account. Change anything there, then come back to the app and I check again.
Two quick questions come up the first time I open a show: which hand runs your show, and how big you want the buttons. Answer them and I lay the console out for you. You can change both later in Settings, under Customize controls.
Open my tutorial show.
This is home. Every show you own is a card here. I already built one for you, so you can press buttons without killing anything that matters.
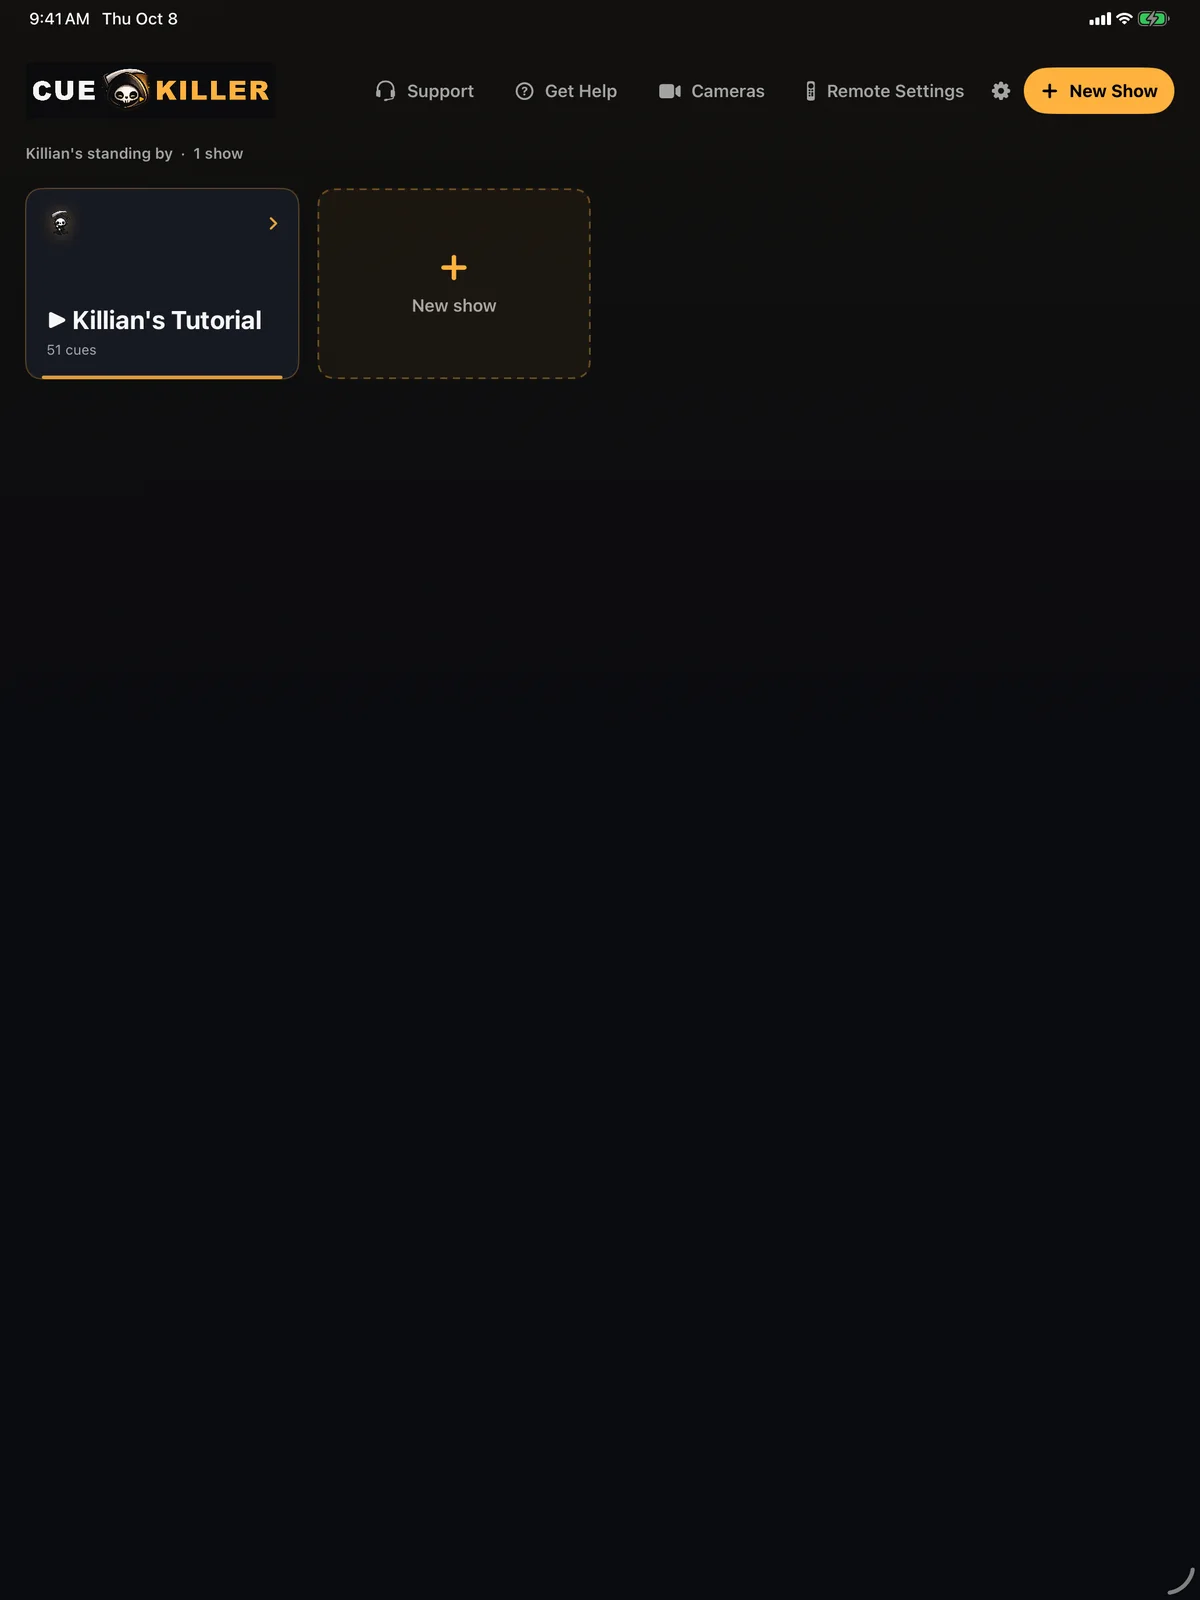
Tap the card called Killian's Tutorial. It opens the console: the screen you run shows from, with the cue list, the program preview, and the big GO button. You cannot break anything in there. Press whatever you like.
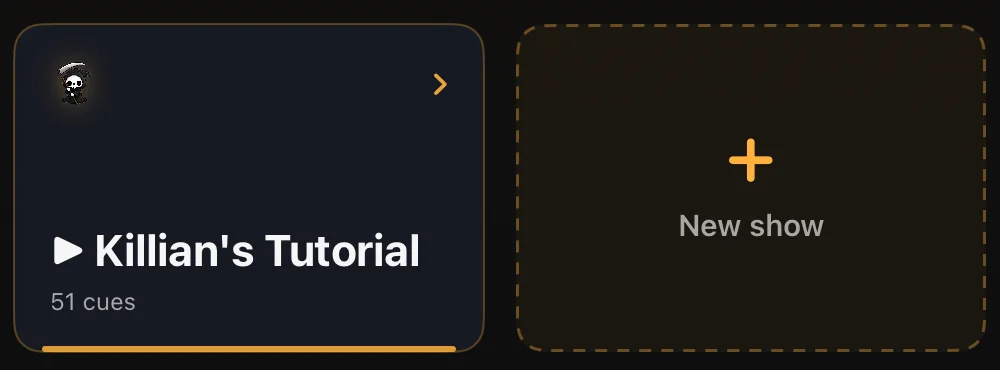
Press and hold any show card for its quick menu: Rename, Duplicate, Color, Export, Delete. Deleted shows wait 30 days before they are gone for good. Even I give them a grace period.
The question-mark button up top is my help sheet. Tap it any time and ask me a question in plain words. I know your show, what is live, and what fires next.
Press GO.
This is a working copy of my console. Let's run a little show right here on this page before you touch the real one.
Watch the list when I press GO. You go next.
Four cues, in order. Nothing is on the screen yet. Standby.
And... gone. Cue 1 turned green. It is on air: the welcome slide is on the big screen. Cue 2 turned amber. It is next: the one GO fires when you press it again.
Press the green GO above until the show ends. Then press BACK and watch the amber move. Then tap any cue in the list.
BACK never fires anything. It only moves the amber NEXT marker up one. Tapping a cue does the same thing: it makes that cue next. So you can skip around a show without playing a thing. No dead air, no accidental sting.
Now do it for real. In my tutorial show on your device, press the green GO button. Keep pressing. Every cue teaches you one thing.
Green means on air. It is happening on the audience screen right now. Amber means next. It is standing by, waiting for GO. The GO button itself tells you what it will fire: look at the small text under the word GO.
Stop all (the red button) stops every sound and clip. Restart show puts the amber marker back at cue 1. Neither one deletes anything.
If GO ever turns amber and reads DELAYED, that cue has a delay set on it. It is counting down, not broken.
The big screen.
Your audience never sees the console. They see the program: the box at the top of your screen that says "on the big screen". The console is ours. The program is theirs.
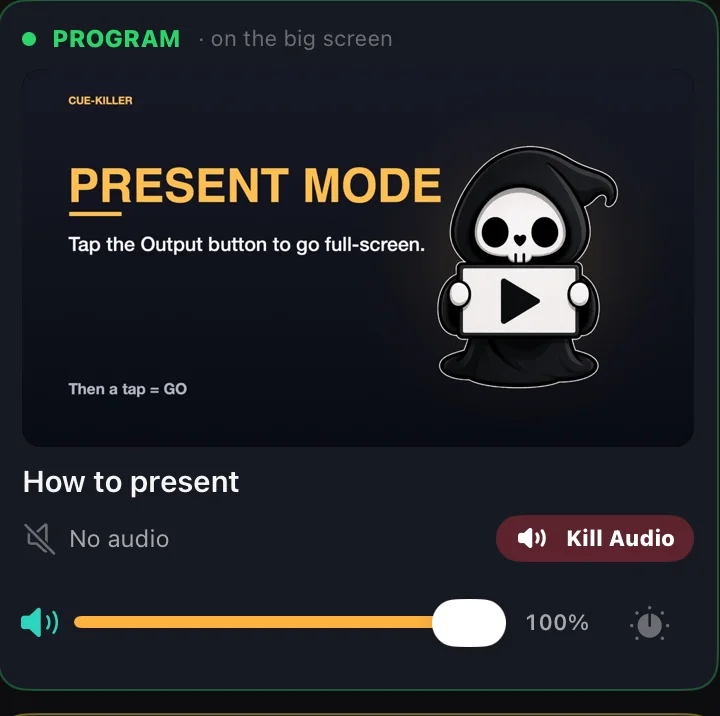
Two ways to get it on a screen
When nothing is live, I show your default screen, never dead black. Out of the box that is my own card. Put your logo there instead; we do that in the branding step.
Output mode (that first button) fills your own screen with the program too, and hides every control. One tap anywhere = GO. Use it when you run the show from a remote and want nothing on your iPad but the show.
HDMI, AirPlay, a live stream and NDI all carry the exact same picture. The console preview mirrors it, so what you see in the program box is what they see.
A Blackout cue kills the output to black on purpose. "Black out external display" in Settings darkens only the TV, which is handy between sets.
Two consoles, one twist.
Hold me upright and I'm the building console: the full list, the editor, every control. Turn me sideways and I become Perform mode: a running console you can read from across a dark stage.
In Perform mode the side panel has a small button at its top: Cues swaps in the full running order (tap any cue to make it next), Now & Next swaps back to the giant view. On iPad, drag the divider to make the cues as big as you like. I remember the size.
Rotate back upright any time to keep building. Nothing fires, nothing changes. The show just turns with you.
You choose which side the program sits on in Perform mode, whether the audio scrubber shows, and whether it opens on the giant view or the full list. That lives in Settings, under Customize controls, in the Landscape show screen section.
Perform mode has its own Stop button for the live track and clip, and a DETECT button for prop and pose triggers. More on DETECT in the hands-free section.
Build your own show.
You have pressed GO on mine. Now make one of yours. Three moves: new show, add a cue, pick what the cue does. The first two are on this screen.
1. New show
Go back to home and tap New, then New empty show. Give it a name.
2. Add a cue
In the empty console, open the three-dots menu (top right), tap Add, then Add cue. Or press and hold anywhere in the cue list to open Arrange, where a + adds cues.
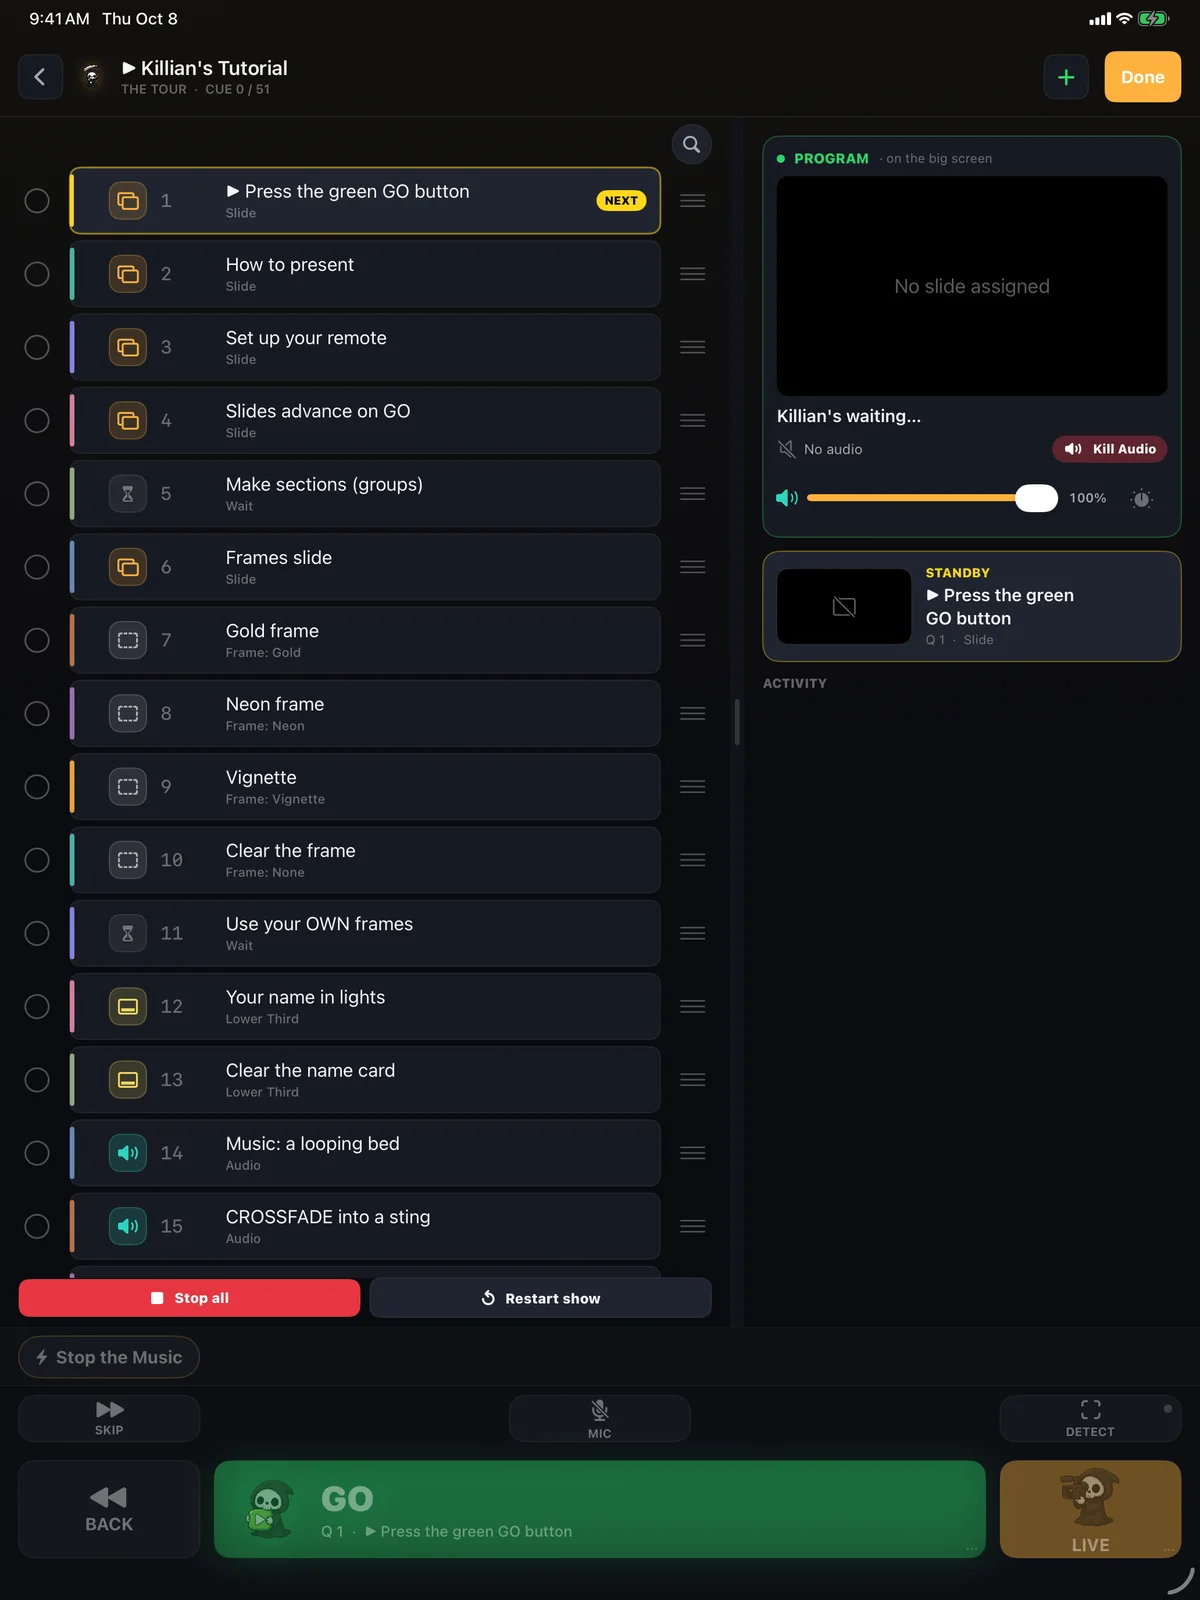
Build it anywhere. Turn on iCloud sync in Settings on each of your devices (same Apple account) and every edit you make on the iPhone shows up on the iPad, and the other way round. One show, every device, nothing to re-edit. Off by default; it takes effect the next time you open me.
Sync merges rather than overwrites: shows on both devices are kept, and nothing is deleted by turning it on. Your local copies stay as a backup.
Press and hold any show card on home for Rename, Duplicate, Color, Export and Delete.
In Arrange you can also select several cues at once and Cut, Copy, Paste, Group or Delete them together. Tap Done to leave Arrange. The show runs the same either way.
Pick what the cue does.
A new cue opens the cue editor. The first row, Type, is the heart of every cue. Pick a type and the rest of the editor reshapes itself around it.

The types you will use most, one at a time:
- Slide. One image on the big screen.
- Video. A clip, with its own sound.
- Audio. A song, a sting, a voiceover.
- Slide Deck. A PDF. GO pages forward, BACK pages back.
- Camera. Cut the live camera onto the screen.
- Text. Big words on screen.
- Blackout. Kill the screen to black. My favorite word, used responsibly.
Try it now: set Type to Slide, tap Slide / media, pick any photo. Tap Done. Tap your new cue so it turns amber, then press GO. Your photo is on the program.
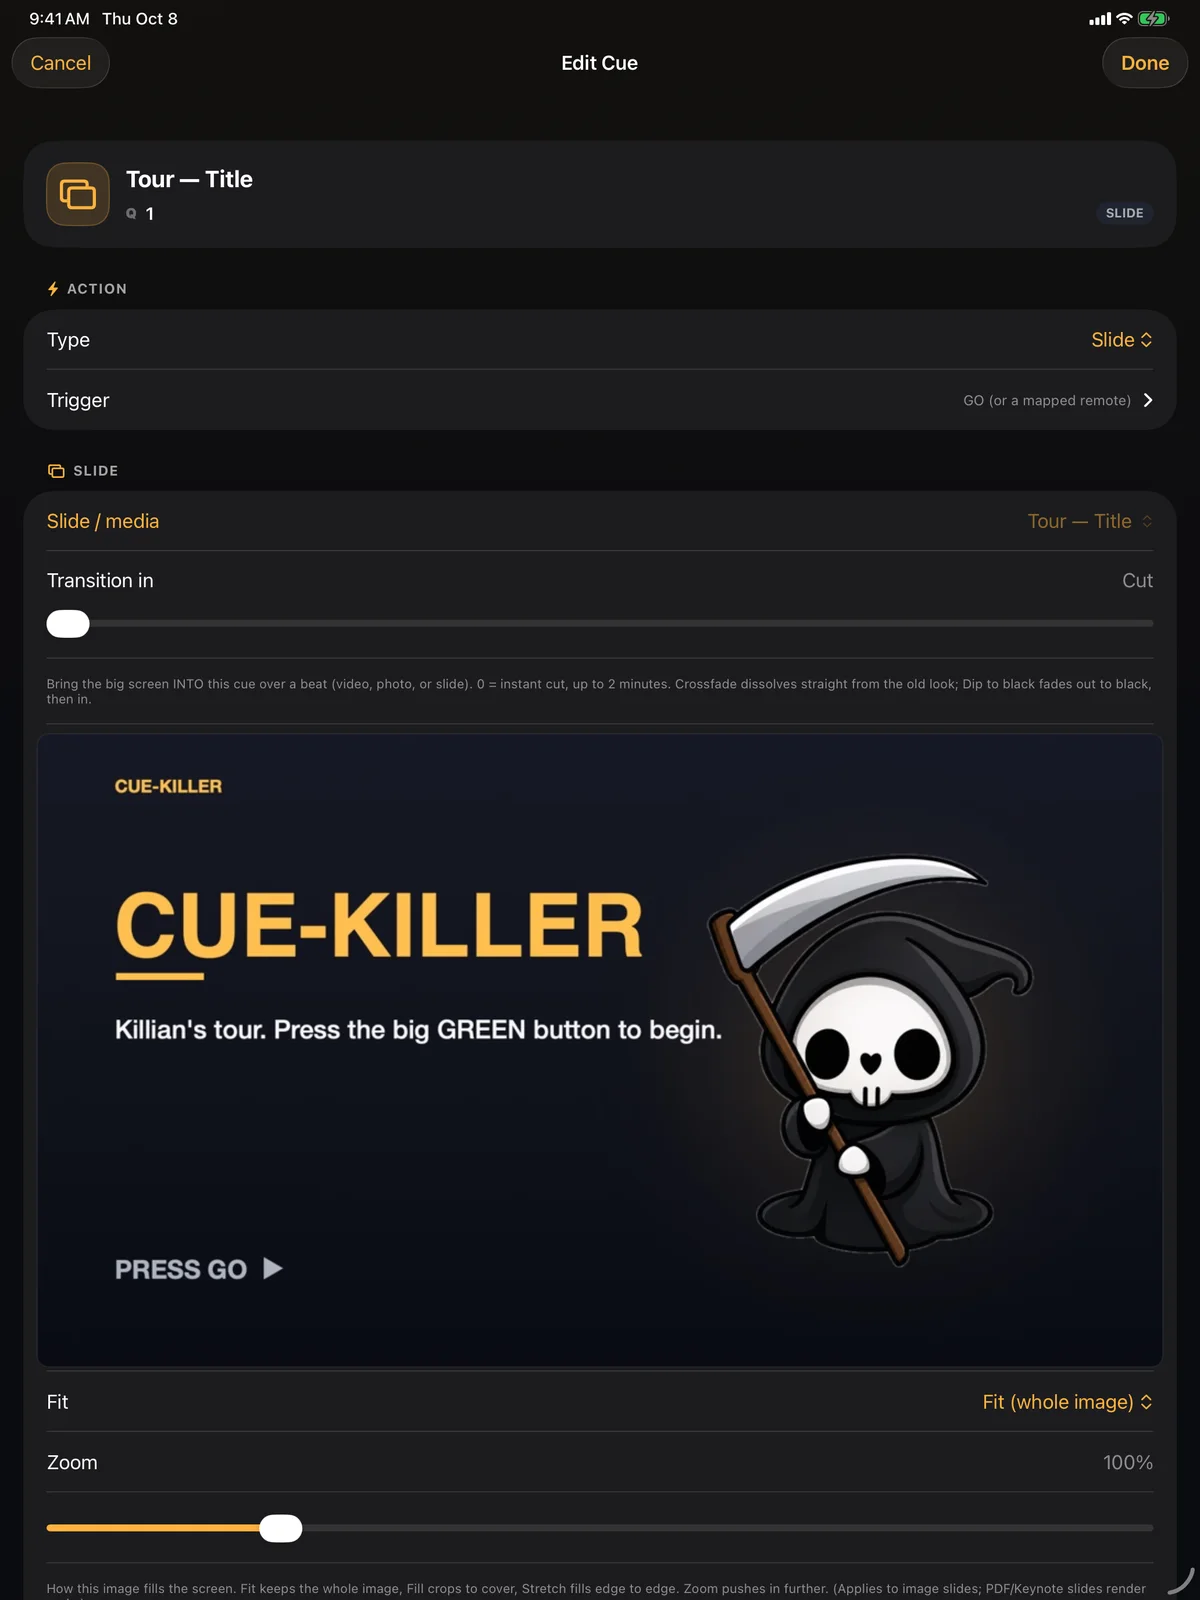
Tap a cue once to make it next. Tap it a second time to open its editor. Swipe a cue left for Delete, Arm and Duplicate.
New cues name themselves after their media ("Intro Sting"). Type your own name and I stop renaming it.
On a Slide, Fit shows the whole image, Fill crops it to cover the screen, Stretch pulls it edge to edge. The preview updates as you choose, so there are no surprises on stage.
More types live under the same picker: QR code, Lower third (a name card), Overlay, Frame, Live Text, Live Captions, Stop Audio, Stop Video, Camera Zoom, Audience, and more. You will meet the important ones later in this walkthrough.
Feed me.
Everything you give me lives in one library, shared across every show you build. Drop it in once. I keep it.
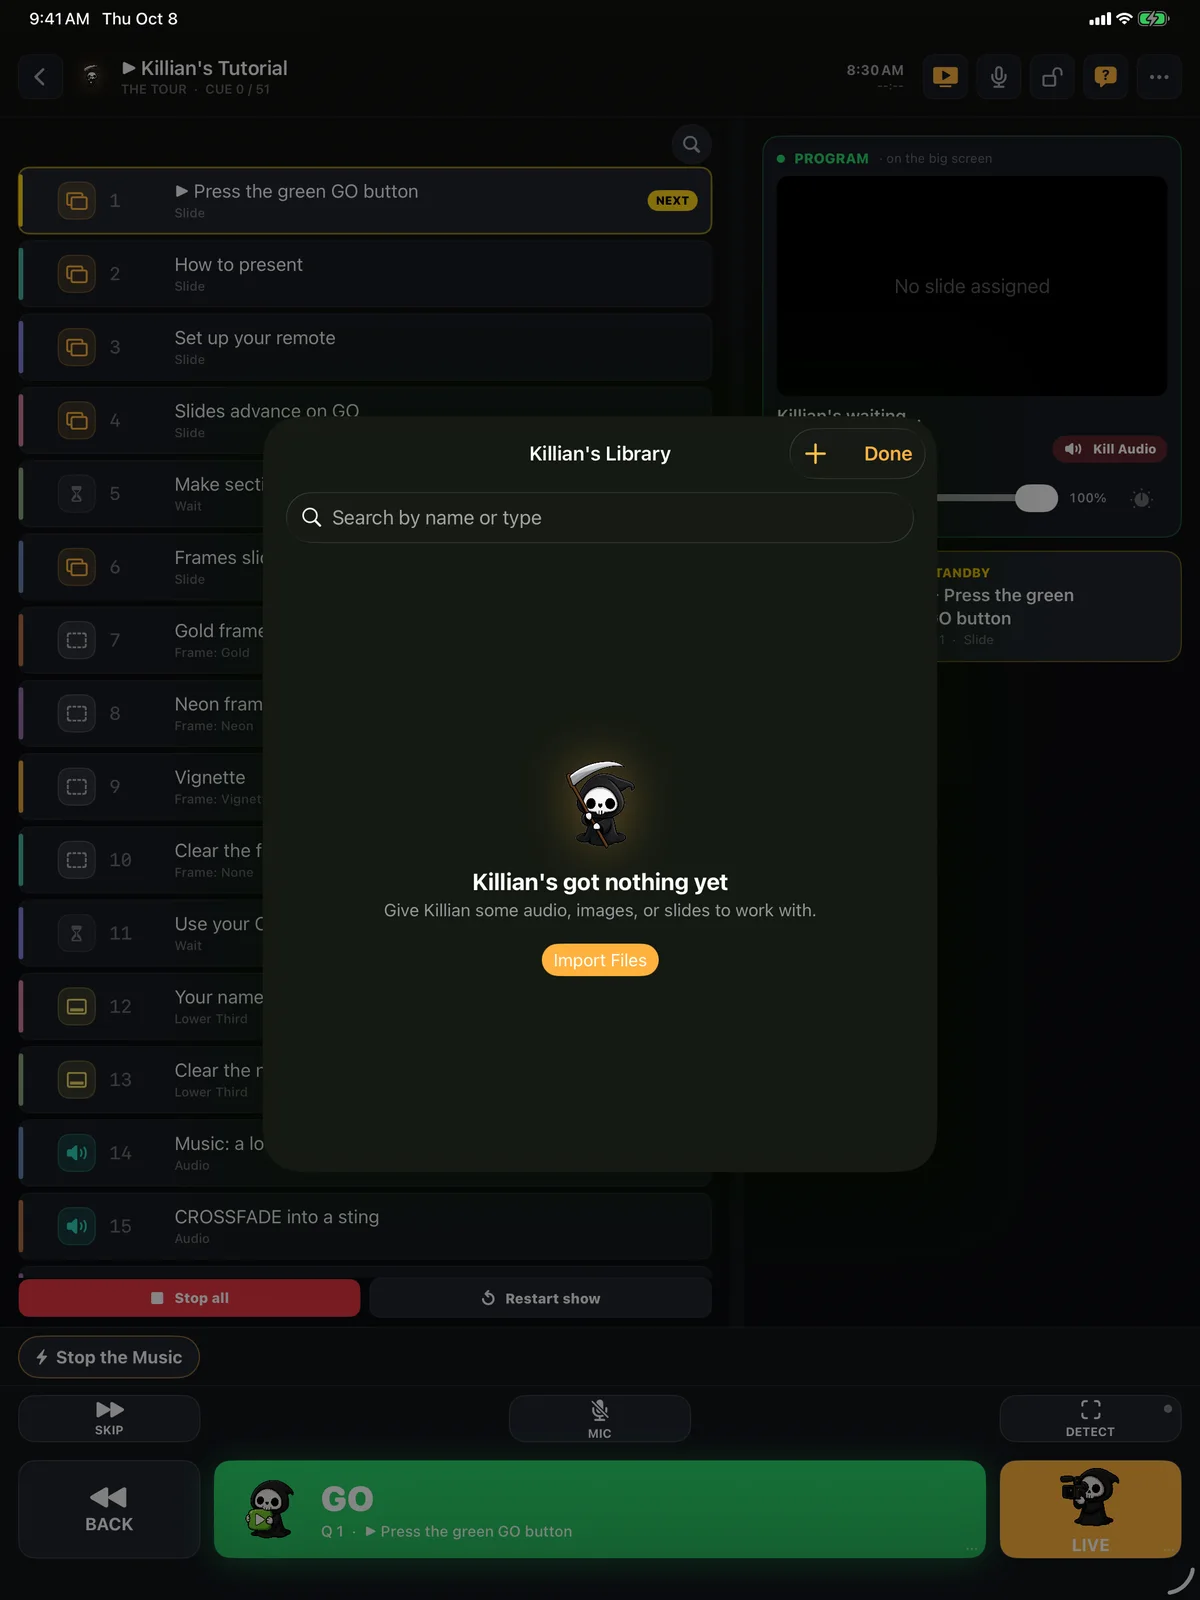
Tap + and pull in:
- Photos. Any image or video from your camera roll.
- Files. Songs, videos, PDFs from iCloud Drive, Dropbox, a USB stick, anywhere Files can see.
- Generate with AI. A voiceover, a music bed, a sound effect, a title card. Made here, on the spot.
A professional opening voiceover, no studio
Tap +, Generate with AI, mode Voice. Type the line: "Ladies and gentlemen, please welcome..." Pick a voice, tap Generate, listen. Wrong word? Change the line and generate again. Too long? Trim it on the waveform right in the cue. It lands in your library as an Audio cue, ready for GO. Title cards work the same way with the Image mode.
Slides from Keynote or PowerPoint: export the deck as a PDF, bring it in, and add a Slide Deck cue. GO pages forward through it. BACK pages back. Builds and animations do not survive the trip, so put each reveal on its own page.
You can also do this inside a cue. In the editor, open Slide / media or Audio file and tap "Search, rename & preview". Import or generate right there without leaving the cue.
Search the library by name or type. Swipe a row to rename a clip so you stop guessing at filenames. Every clip shows a thumbnail.
Normalize loudness (the switch at the top) evens out every track so nothing jumps out louder than the rest. Each cue still has its own level trim on top.
The first AI sample is on me. For unlimited generation you add your own keys once (ElevenLabs for voice and effects, Suno for music, OpenAI for images) in Settings, AI & API keys. Details in the AI step at the end.
Moving to another iPad? Export the show from the three-dots menu. The file packages every sound and image inside it, so it opens on the other device with everything already linked.
What happens after a cue.
Every cue has one setting called After this cue. It decides whether I wait for you or keep going on my own.
Wait for my next GO
The default. The cue fires, then I stand by until you press again. Most of your show is this.
Auto-continue
The next cue fires at the same instant. Stack a slide, a sting and a camera cut on one press of GO.
Auto-follow
The next cue fires on its own after a delay you set. Timed reveals, self-running slideshows.
When this finishes
On a song or a video: the next cue fires the moment the track ends. Back-to-back songs with no guessing.
Delay before firing holds a cue for a beat after you press GO. A built-in dramatic pause. Transition in on any visual cue crossfades the big screen into it instead of cutting.
Crossfade two songs the easy way: on the outgoing song, under "If it plays to the end", turn on Blend into the next song. I fire the next cue early and blend the two. Nothing to set on the next cue.
"When GO moves on" on an audio cue decides what happens to a playing track when you press GO: keep playing under the next cue, or fade out over a few seconds.
Build a trick once.
A trick is never one cue. It's the intro music, the title slide, the camera cut, the sting, the blackout. Eight cues, in order. A routine is those cues saved as one block, so adding the trick to a show, or pulling it out, is one move.

- Open Arrange (press and hold the cue list).
- Tick the cues that make up the trick.
- Tap Group. Name it ("Card to Wallet"), give it a color. It folds into a colored folder in the list, and it is saved as a routine in a library shared by every show you own.
In any other show: three-dots menu, Add, Insert routine. Pick it. All eight cues land in order, media attached, timing intact. Cut a trick from tonight's set? Select the folder in Arrange and delete. One block, in or out.
Change a cue inside a routine and I ask whether to update the saved routine too. Fix it once, fixed everywhere.
To move a whole routine inside a show, tap its name tag in Arrange to fold the group into one row, drag that row, then tap it to expand again.
Routines are how my AI show builder organizes a show too: every section it drafts arrives as a named, colored group.
Fire something off-script.
Not everything happens in order. The heckler needs a rimshot. The music has to stop now. An impromptu cue is a button that fires any time, without moving your place in the show.

- Three-dots menu, Add, Add impromptu cue. Pick what it does: a sound, Stop Audio, a slide, a camera cut, anything.
- It lands on the strip above GO. Tap the chip and it fires. The amber NEXT marker stays exactly where it was.
- Put it on a remote button. In Remote settings, find it under "Your impromptu cues", tap Learn, press the button. Now the sting lives under your thumb all show.
One chip, several things. Open the chip and use "Also do" to stack actions: show a slide and play a sound, with a delay on either if you want them staggered. The chip shows a small number when it fires more than one thing.
Jump to Cue is a cue type made for this. As an impromptu, it leaps the show to any cue you pick and carries on from there. Skip a trick that isn't landing without scrolling a list in the dark.
Press and hold a chip to edit or delete it. Impromptu cues can take voice, gesture and prop triggers too, so "stop the music" can literally be the words "stop the music".
The Stop All button in Perform mode stops the live track and clip but leaves a slide or camera up: those are a look, not a thing to stop.
You can build a show and run it
Everything from here makes the show bulletproof, then hands-free (cueing with no remote: voice, physical gestures, prop recognition). Nothing past this point is required to run a show tonight.
Before you move on: is there anything you'd like to review?
Pick a section to go back to
Run it from your pocket.
A MediaStar Pro, an Audio Ape, a foot pedal, a Flic, a presentation clicker, a game controller, a MIDI pad. Any of them can be my GO button so you never touch the screen on stage. Press a button and I tell you what I heard, whatever kind of remote it is.
- Pair it with iOS first. Open the iPad's Settings, Bluetooth, and pair the remote there like any accessory. (Flic buttons are the exception: they pair inside me, under Connect a device.)
- Open Remote settings. Three-dots menu, Setup, Remote settings. Or the Remote Settings button on the home screen.
- Press any button on the remote. The "Press a button to test" row names what it heard. If nothing shows up, the remote is not reaching the iPad yet. Fix that before anything else.
- Map it the one-tap way. Under Set buttons, "Auto-map a known remote" has presets: Audio Ape, MediaStar Pro, a presentation clicker, Logitech. Pick yours and forward is GO, back is BACK.
- Or teach it button by button. Next to GO, tap Learn, press the button you want. Single, double, triple, quad and hold are all separate, so one button can do five things.
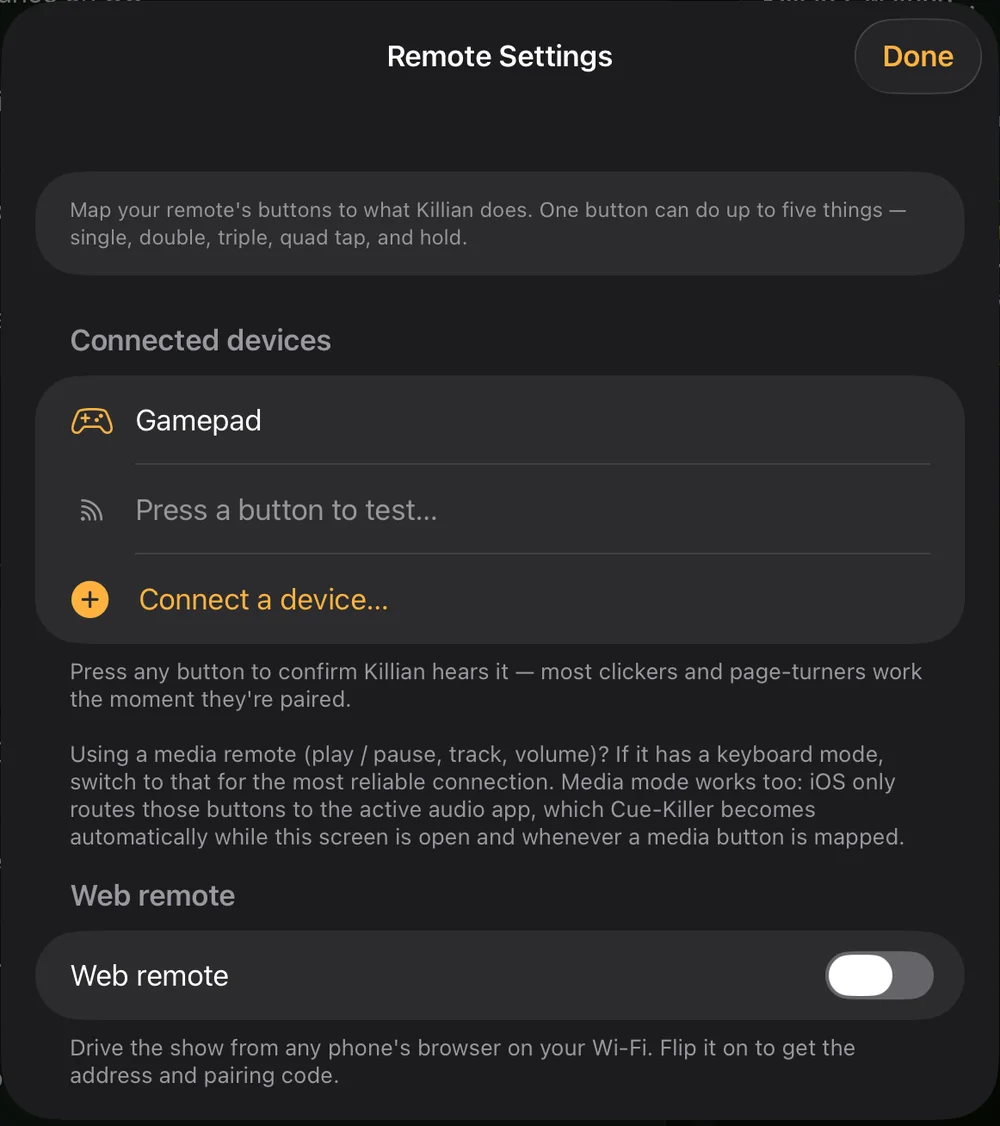
Before every show: the Pre-show remote check lists every remote your mapping uses. Press each one and it turns green. Clickers cannot tell me when they drop, so this press-test is the only way to truly know they are alive. Ten seconds. Do it.
No remote at all? Flip on Web remote. Any phone on the same Wi-Fi opens a browser page with GO, BACK, camera and panic, gated by a pairing code.
If a remote goes quiet mid-show it is almost always one of three things: a dead battery, the remote's own mode switch (many pedals have profiles, and a new profile orphans your mapping), or it drifted off Bluetooth. The pre-show check tells you which.
Media remotes like the Audio Ape or MediaStar: if it has a keyboard mode, use it. It is the most reliable way to connect.
Make the console yours.
Left-handed? Big thumbs? Hate clutter? One screen lays the whole console out your way: Settings, Customize, Customize controls. The big BACK, GO and LIVE row never moves. That path is sacred. Everything else is yours.
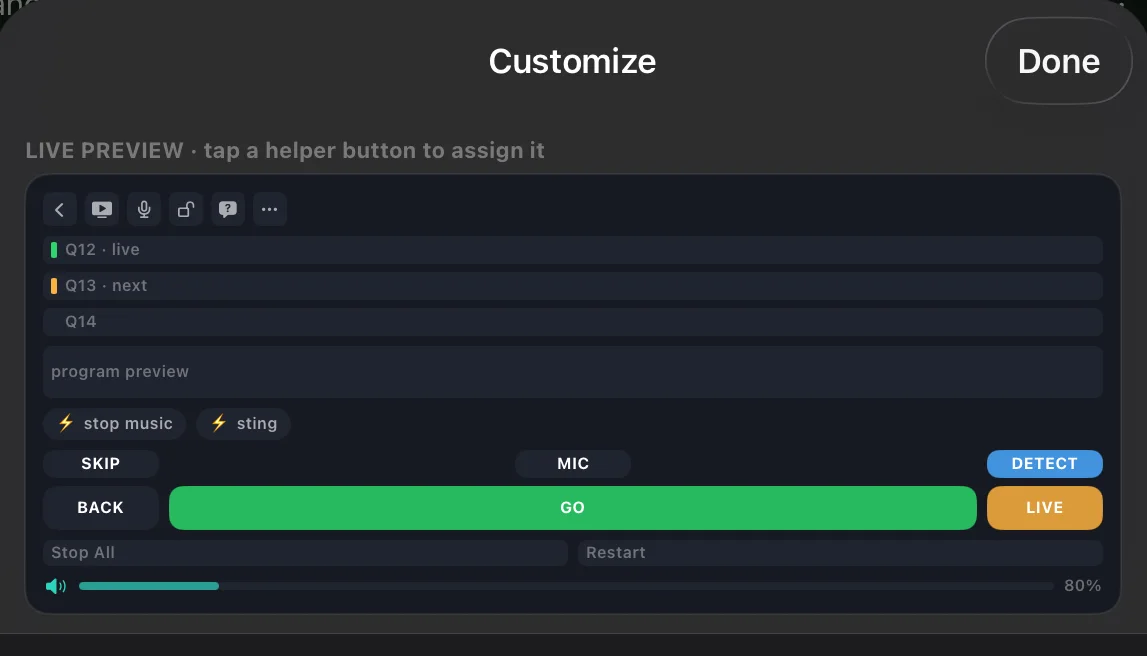
The helper row
The small row just above GO. Three slots. Put what you reach for in them: Skip, a Mic toggle, Detect, Stop All, Kill Audio, Volume up or down. Tap a slot in the preview and pick.
Your hand, your size
Left or right handed mirrors the row. A slider makes every transport button bigger or smaller. Presets if you want a head start: Standard, Minimal, Lefty, Big buttons.
The top bar
Choose which buttons ride up top (Output, Mic, Lock, Help, Cameras, Remotes, Library, Pre-show check...) and drag them into your order. Anything you leave off still lives in the three-dots menu.
Hide what you don't use
Turn off whole sections: the top bar, the impromptu strip, the Stop All and Restart pair, the volume fader. A show clock that counts down to your set length. A haptic tap on GO. Bigger, brighter cue names for a dim stage.
One Reset all puts everything back to how I shipped. Nothing in here can break the GO path.
The Settings page, top to bottom: Account & Cloud; Customize (Customize controls, Default screen, Audience cue branding); Devices (Display & broadcast, Cameras, Peer camera, Microphone, Remotes, Web remote); Audio; Media library; AI & API keys; Power user; Help; About.
Settings, Audio holds the app-wide default for what GO does to a playing track. Settings, Devices, Microphone holds "What the mic hears", which matters for voice triggers in a loud room.
The LIVE button's camera transition can be a Cut or a Fade, set in Customize controls too.
Put your name on it.
Three places the audience sees you, not me. Set them once and every show wears them.
The default screen
When it shows: any time nothing is live. Before the show, between cues, after the blackout. The room never sits on dead black. Where: Settings, Customize, Default screen. Upload a 1920 by 1080 image, or tap Design a screen with your logo: drop in your logo, drag it into place, size it, pick a solid color or a background photo, save. I render the finished screen for you.
A screen for this show only
When it shows: the same moments, but for one show. A "starting soon" card for the corporate gig, your own logo for the theater run. Where: inside the show, three-dots menu, This show, Screen & branding, Default screen. It overrides the global one.
The audience join page
When it shows: on the audience's own phones when they scan your poll's QR code. Your name and your colors, not mine. Where: Settings, Customize, Audience cue branding.
A Lower Third cue is a name card over the program: your name, a title, a subtitle. Add one to your opening and the room knows who walked on.
If picking a photo for the default screen seems to do nothing, it is probably an iCloud photo that has not downloaded yet. Open it once in the Photos app, then try again.
Want black instead of a default screen? Settings, Default screen, Off. A Blackout cue always wins anyway.
Frames (a border preset or your own full-screen PNG) and Overlays (a persistent graphic) stay up across cues until another cue changes them. Position the overlay with Overlay layout under Screen & branding.
Before you walk on.
The worst time to find a missing file is in front of an audience. This takes one minute, and it is the difference between a show and an incident.
- Pre-show check. Three-dots menu, Setup, Pre-show check. It lists every cue whose file has gone missing and puts a Relink button next to each one. Red turns green.
- Press each remote button. Green means alive.
- Look at the audience screen. Your default screen should be up, not a desktop.
- Lock it. Tap the padlock up top. Long-press, swipe-to-delete and drag-to-reorder all switch off, so a stray thumb on a dark stage cannot rearrange your show. GO still works.
If something goes wrong
- Stop all (red button) stops every sound and clip. Slides stay up.
- Kill Audio (in the program panel) silences everything instantly.
- Panic: press and hold LIVE. The screen goes black and every sound stops. Then take a breath and press GO on whatever comes next. I've already queued it.
Every edit autosaves. A crash mid-save cannot corrupt a show. The three-dots menu keeps an Undo history for deletes.
Lost your place on a long show? The small magnifier at the top of the cue list searches by number or name. Tap the match and it becomes next.
Now the fun part.
Four power features, each its own short section. None of them is required; the basics already run a show. Pick where to start. I'm patient. I have all the time in the world.
Hands-free: cueing with no remote
Three ways: your voice, a physical gesture, or prop recognition (I see the object and fire). Everything you learned still applies. This is on top of GO, never instead of it.
Ready, or do you want to look back first?
Pick a section to go back to
Fire a cue with your voice.
Any cue can carry a phrase from your script. When I hear it, I fire the cue. No clicker, no tap, no looking down. You say the line you were going to say anyway.
- Open a cue and tap the Trigger row, right under Type.
- Open Voice trigger and type a phrase. Something from the routine: "show me the money".
- Tap the MIC button on the console so I am listening.
- Say it. The cue fires. Another dead cue. Good.

Live Text puts what you say on the big screen, live. Turn on Between and give it a start phrase ("the number is") and an end phrase ("right"). Only the words spoken between them land on screen. Perfect for a reveal that has to land on the beat.
If voice triggers fire when you stand next to the iPad but miss you from the stage: Settings, Devices, Microphone, and switch "What the mic hears" to Hear the whole room. iOS otherwise filters an amplified voice as noise.
A lav or wireless mic plugged into the iPad is picked up automatically. You can also pin a specific input so I never grab the wrong one.
"Fire once per show" stops a phrase from jumping back to the same cue twice.
Show me a prop. Or a gesture.
The camera can fire a cue when it sees an object, or when it sees you move. Hold up a watch and the sting plays. Put a hand on the spectator's shoulder and the lights change. I'm watching. In the good way.
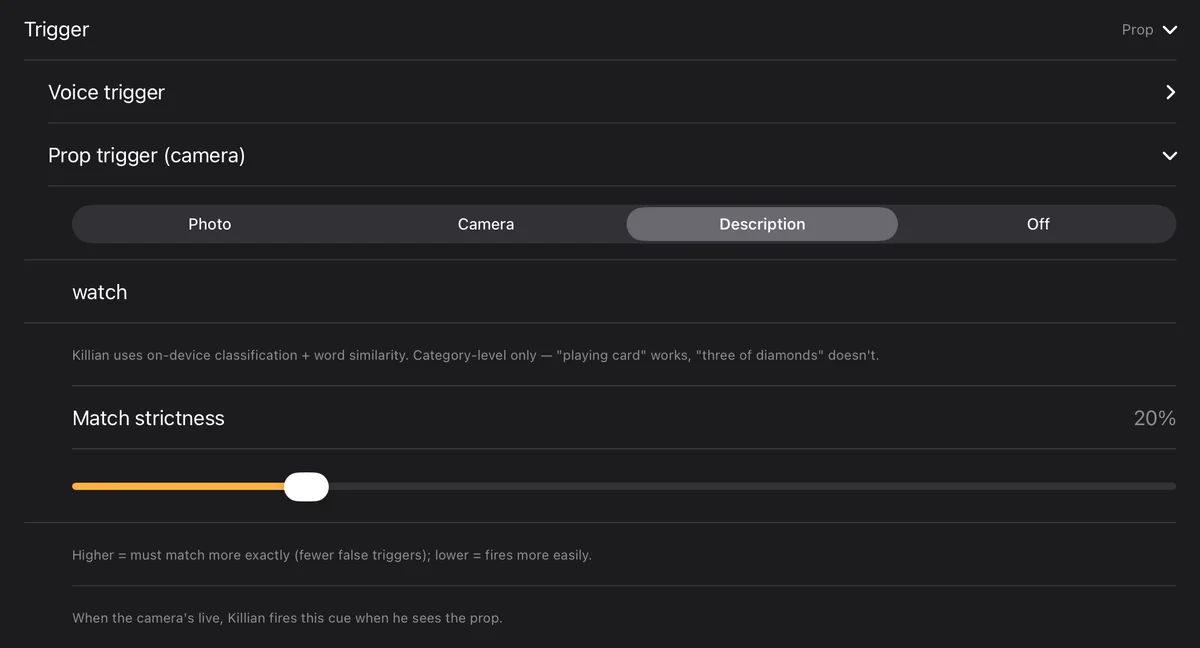
- Open a cue, tap Trigger, open Prop trigger (camera).
- Pick Description and type what I should look for: "watch", "playing card", "red rose". Category-level words work. "Three of diamonds" does not.
- Turn on DETECT on the console. This is the step everyone misses.
A prop trigger needs the camera running, not on screen. If a prop trigger "does not work", DETECT being off is almost always why.
Gestures, not just props. Under Action trigger (camera), pick a movement: a hand on a seated spectator's shoulder, both hands overhead, arms out wide, hands brought together. Or tap Train a custom pose, strike it for the camera, and capture it. I fire it wherever you stand.
Match strictness: higher means the prop must match more exactly (fewer false fires). Lower fires more easily. Start in the middle and rehearse.
All of it runs on the device. No internet needed for a prop or pose to fire.
Where DETECT lives: it is a helper button above GO, and its own button in Perform mode. If you do not see it, Settings, Customize controls, and put Detect in one of the helper slots.
Cameras
The built-in camera, a capture card, or any phone in the room. One tap puts it on the big screen.
Ready, or do you want to look back first?
Pick a section to go back to
Tap LIVE.
The amber button next to GO. Tap it and the camera is on the big screen. Tap it again and you are back on your slide. No crew. No cable snake. I came for your cables, and I'm pleased to report there aren't any.
Press and hold LIVE to pick which camera: front, back, a USB capture card, a Browser Cam, a Peer Camera. Hold it longer still and that is Panic: black screen, silence.
Any phone as a wireless camera
Your spare iPhone. A friend's Android. An audience member's phone, handed to them for the close-up and handed back after. Two ways in, no cable either way.
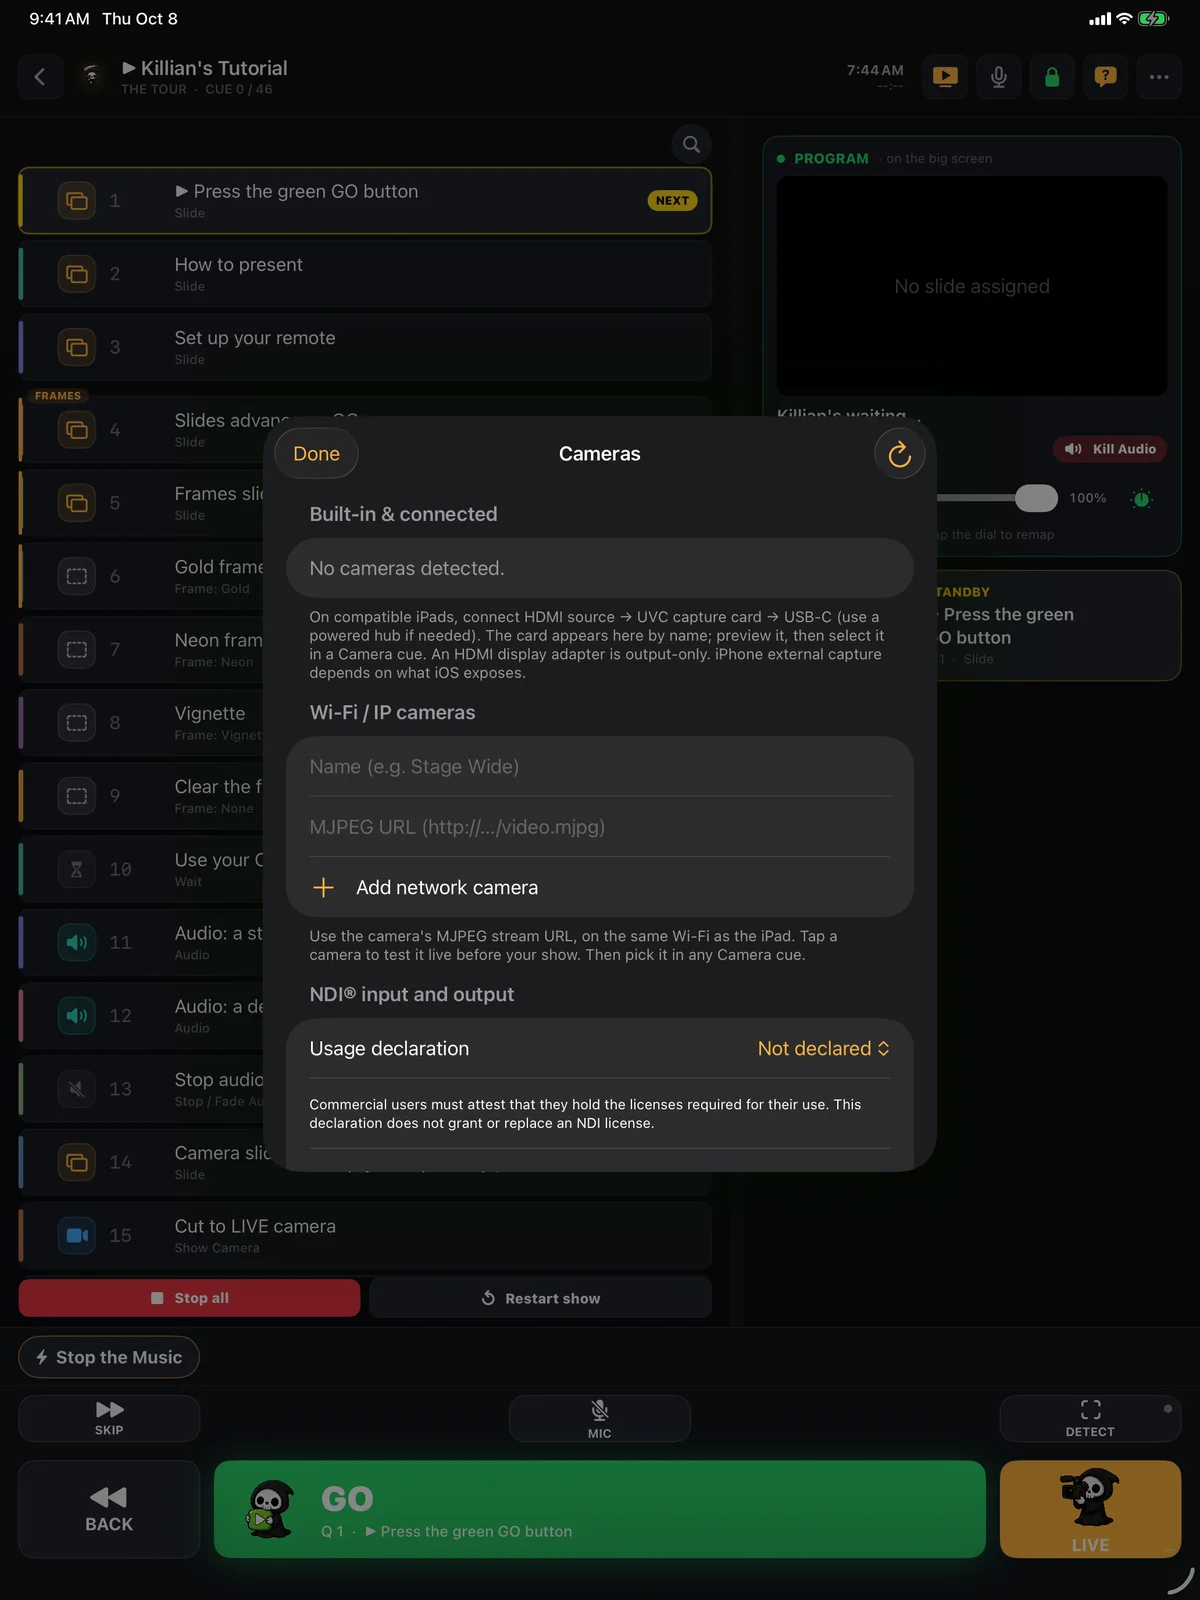
A real camera with HDMI out plugs into the iPad through a USB capture card. It shows up in Cameras by name. An HDMI display adapter is output only, so it cannot bring a camera in.
A Camera cue does the same as LIVE but as part of the running order, with its own look: brightness, black point, saturation, even a torch. Two cameras at once, picture-in-picture or split, is set on the Camera cue under Layout.
Never cut to a camera you have not looked at. The Peer camera screen shows a live preview, off air, before you trust it.
The audience joins in
A poll, a number guess, a word cloud. The room answers from their own phones, and the results animate on your big screen.
Ready, or do you want to look back first?
Pick a section to go back to
Run an audience poll.
One cue type does it. The room scans a code, answers on their phones, and the votes land on your screen live. Two hundred people, zero clickers to hand out.
- Add a cue and set its Type to Audience.
- Pick the activity: a Poll (you name the options), Pick a number, or a Word cloud.
- Type your question. For a poll, add a few options.
- Press GO. The QR code and your question jump onto the program.
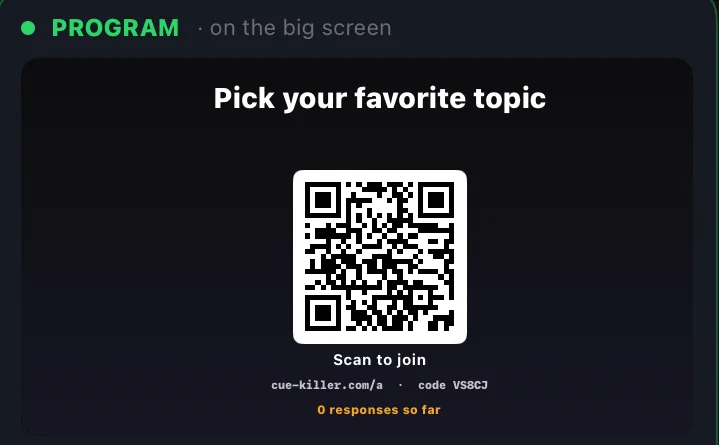
They can be on any network, even cellular. Poll bars fill, the popular number pops, words swarm in. Fire the next cue to move on, like any other cue. The join page wears your branding, not mine.
Want suspense? Set the first Audience cue to Join (it only shows the QR so people get in), then a second Audience cue set to Reveal opens the live results when you are ready.
Your name and colors on the join page: Settings, Customize, Audience cue branding.
AI, and asking me for help
Draft a whole show from a sentence, make media you do not have, and ask me anything from inside the app.
Ready, or do you want to look back first?
Pick a section to go back to
Let me do the typing.
Three things. A show from a sentence, media from a prompt, and answers from me. I'm no wizard. I just worked in AV long enough to know what you'll ask.
Build a show with AI
On home, tap New, then Build a show with AI. Describe your act in plain words. I draft a full cue list: slides, music, camera cuts, timing, grouped into routines. Preview it, then add it and make it yours.
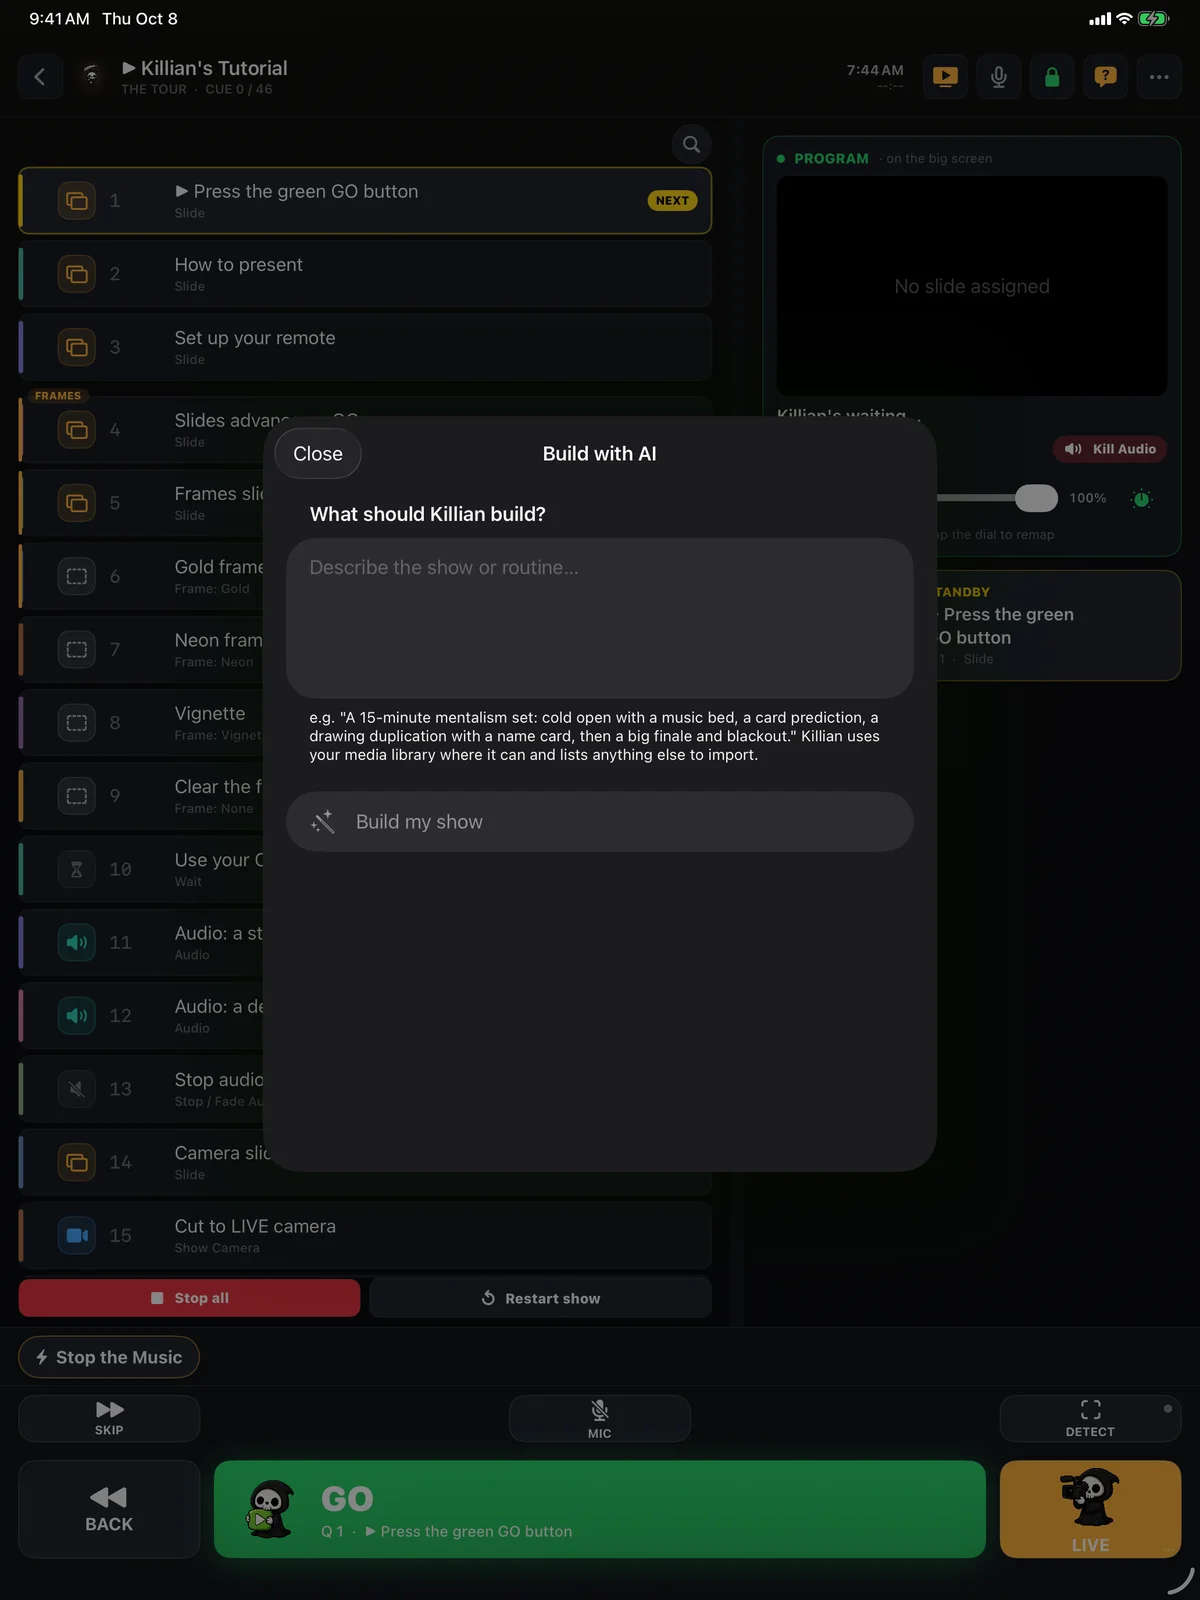
Generate with AI
In the Media Library, tap +, then Generate with AI: a voiceover, a music bed, a sound effect, a title card, a voice changed into another voice, a cloned voice, a noisy recording cleaned up. The first sample is on me. After that, add your own keys once in Settings, AI & API keys, and every generator is yours.
Ask me anything
The question-mark button up top opens a chat with me. I know your show, what is live and what fires next, so "why isn't my mic working" gets a real answer. For some questions a Show me button appears and I walk you through the real controls, hands-on.
If I ever come up empty in the chat, a button offers "Add my API key". With your own key I answer directly instead of through the shared line. A question costs a fraction of a cent.
The in-app tours: a Basic tour, an Advanced tour, and hands-on walkthroughs for remotes, voice, phone cameras, polls, AI media, and the pre-show check. All under "Show me around" in the help sheet.
Things you'd never think to ask for.
You can run a show with what you already know. This is the rest of the booth, one line each, with where it lives. Skim it now, remember it later.
On the screen
- Live Captions. A rolling subtitle band of what you say, clears itself after a pause. A cue type.
- Lower Third and QR. A name card over the program; a scannable code for a poll, tip jar or socials. Cue types.
- Transition styles. Crossfade, dip to black, flash through a color, wipes and slides, per visual cue, under Transition in.
- Frames and overlays. A border preset or your own full-screen PNG; a persistent graphic positioned by drag. They stay up until a cue changes them.
- Operator-only reminder. Every cue can carry a private note or a photo of the prop setup that only your screen shows. In the cue editor.
Sound
- Duck the music. On an audio cue, "Duck music for this cue" lowers the bed under a voiceover and brings it back. A Set Volume cue rides every playing track to a level.
- Blend into the next song. On the outgoing song, under "If it plays to the end". I fire the next one early and crossfade.
- Trim and fades on the waveform. Drag the side handles for in and out, the small top handles for a fade. Pinch to zoom onto the beat.
- Master volume fader under the program preview, with a scrubber while a track plays. A MIDI knob can drive it.
- Walk-in playlist. Settings, Audio, paste a Spotify playlist link and open it from the show.
Cameras and the room
- Camera Zoom cue. Punch in on the live camera, hold, zoom back out on its own.
- A look per camera cue. Brightness, black point, saturation, torch. Crush a busy background to black for close-up work.
- Two cameras at once. Picture-in-picture or a 50/50 split, set on the Camera cue under Layout. Swap them from the LIVE hold-menu.
- Web monitor. The web remote address plus /monitor mirrors the program and the NOW and NEXT on any phone in the wings.
- Live stream. Settings, Devices, Display & broadcast: YouTube Live, Twitch or Facebook Live straight from the show. NDI in and out for a video switcher.
Power user
- Output layers. Up to eight images, videos, text or color layers over the program per cue, with keying for green screen and LUTs. In the cue editor, "Set output layers with this cue".
- Variables and If / Else. Capture a spectator's word with Live Text, store it, then branch the show on it. Settings, Power user, Advanced Scripting.
- Generate Peek. A cue that runs text through AI and hands the result to another app by URL. Built for mentalism.
- OSC and MIDI. A lighting desk, QLab or TouchOSC fires my cues; a MIDI pad maps by note.
- Find a cue. The magnifier at the top of the list. Type a number or a name; the match becomes next.
Every one of these has a home in my help sheet. Tap the question mark in the app and ask me by name.
That's the whole console.
Here is everything, in one breath. Mine, not yours. I don't need the air.
- Your show is one list. GO fires the next cue. Green is on air, amber is next. iCloud sync keeps it on every device you own.
- Get it on a TV with an HDMI adapter or AirPlay. The audience sees only the program.
- Upright builds the show. Sideways runs it, with a giant NOW and NEXT.
- Add a cue, pick its Type, attach its media. Slides, songs, videos, decks, cameras, voiceovers.
- "After this cue" decides whether I wait for GO or keep going.
- Group a trick as a routine. Add it to any show, or pull it out, as one block. Impromptu cues fire off-script without moving your place.
- Any remote you own, five gestures per button. Press a button to test, map it, press-test before every show.
- Customize controls lays the console out your way. Branding: default screen, per-show screen, audience join page.
- Pre-show check, then the padlock. Hold LIVE to panic.
- Hands-free means no remote: a voice phrase, a physical gesture, or a prop I recognize fires the cue. DETECT lets me watch without going on screen.
- Tap LIVE for the camera. Any phone is a wireless camera. An Audience cue runs a poll from their phones.
- Stuck? Tap the question mark. I'm in there. I'm always in there.